Okay, let’s talk about contouring and highlighting because I know you’re probably feeling like, “Ugh, this looks so complicated, I can never get it right.” But trust me, you’re not alone. Contouring seems like something that only pro makeup artists do, right? But NOPE. I promise, once you get the hang of it, you’ll be slaying contouring and highlighting like a total boss—and it won’t take you forever to do either. Let’s dive into the basics, but in a totally chill, no-pressure way. Grab your makeup kit and let’s get started! 💄✨
- So… What’s Contouring & Highlighting Anyway?
Alright, let’s get this straight—contouring is just creating shadows on your face, and highlighting is all about bringing out the high points of your face with light. Sounds simple enough, right? But, when you start to play around with all the different products, tools, and techniques, it can get a bit overwhelming. Don’t stress! Contouring and highlighting are basically makeup tricks to enhance your features and add dimension to your face. It’s like adding shadows and light to a painting—nothing dramatic, just enhancing what you already have. Think of it as an easy way to sculpt your face, like you’re chipping away at a sculpture (except way less messy). 😅 - Let’s Talk Tools – What Do You Actually Need?
Okay, so before we even start, we gotta talk tools. You don’t need a ton of expensive brushes or crazy products, just the basics will do. You can splurge if you want, but let’s keep it simple for now.
Contour Stick or Powder: This is your shadow. You’ll want it to be a few shades darker than your natural skin tone. I prefer a cream contour stick, but powder works if that’s your jam.
Highlighter Stick or Powder: This is your light. Think of it as your glow-up in a tube. I love a good liquid or cream highlighter, but powder is great for long-lasting results. Whatever floats your boat! ✨
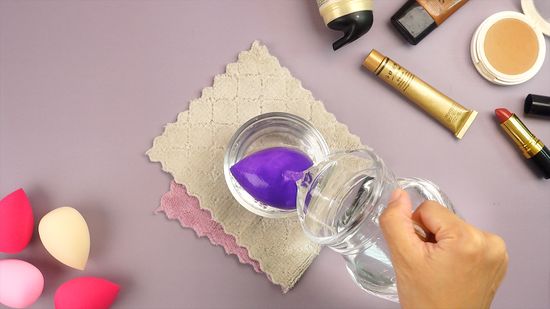
Blending Sponge: Honestly, blending is where the magic happens. Get a good sponge and use it to blend everything out so it doesn’t look like you painted random lines on your face. Don’t skip this step. Trust me, you’ll look like a hot mess if you don’t blend it all out well. 😬
Brushes: You’ll want a contour brush (a flat, dense one works best), a fluffy brush for blending (like a powder brush), and a fan brush for highlighter. Or, if you’re just getting started, your fingers work too! It’s all about finding what feels right.
- Picking the Right Shades for Your Skin Tone
Here’s the thing—contouring isn’t one-size-fits-all. The key to making this look natural is choosing the right shades for your skin tone. For contouring, go for something cool-toned—no oranges, okay? If you pick something too warm, it’ll look muddy, and that’s not the vibe we’re going for. For highlighting, choose something that’s lighter than your skin, but it doesn’t have to be white, either. Aim for something a few shades lighter than your natural skin tone to brighten and lift your face. If you’re unsure, get a few testers at the store and see which ones give you that “oooh, that’s the one!” glow.
Tip: If you’re working with clients, ask them what kind of undertones they have (cool, warm, neutral) before picking out shades. It’ll make a huge difference in how everything blends. 🙌
- Where the Heck Do You Put the Contour and Highlight?
Now, here’s where the magic happens—where do you put all this stuff? Don’t worry, I gotcha.
Contouring the Cheeks: This is where most people get it wrong. You don’t want to apply contour right on your cheekbone, but below it. Suck in your cheeks and apply contour right underneath that cheekbone. Blend it upwards towards your temples, not downwards (unless you’re going for a harsh line, which… we’re not). The goal is to create a shadow that gives the illusion of higher, more defined cheekbones.
Contouring the Jawline: If you’ve got a jawline that’s just begging to be chiseled, grab your contour stick and apply it along your jawline. Blend it down to your neck so it’s seamless. This trick is perfect for defining your jaw and making your face look more sculpted. And if you’re going for the ‘I didn’t eat pizza last night’ vibe, it helps with that too. 😂
Contouring the Nose: Now, if you wanna narrow down that nose (and who doesn’t?), just swipe a little contour along the sides. Blend well, and be subtle with it! Too much, and you’ll end up looking like a clown. Just a light swipe on each side will do the trick.
Highlighting the Cheeks: This is the fun part. Highlighting the tops of your cheekbones makes them pop. Apply it right on top of your cheekbones, and blend it lightly. This gives that ‘lit-from-within’ glow that we all want. 😍
Highlighting the Nose: A light swipe down the bridge of your nose (not too much though, we don’t want to look like a glitter bomb exploded) will make it look super snatched.
Highlighting the Cupid’s Bow: Don’t forget the Cupid’s bow! A little highlight there will make your lips look plumper. You can also swipe some highlighter right in the middle of your chin and forehead for that all-over glow.
Tip: Less is more! Start with a little and build up. It’s always easier to add more than to take it away. 🙅♀️
- Blending, Blending, Blending… Did I Mention Blending?
Okay, blending is where things can either go really right or really wrong. If you don’t blend your contour and highlight well, you’ll end up with harsh lines, and no one wants that. The key is to blend your contour upward, toward your temples, and your highlight downward, toward the apples of your cheeks. Use your beauty sponge to really work that product into your skin. You want everything to look like one smooth, flawless face, not like you’ve just painted it on with a Sharpie. 🖤
Tip: When in doubt, keep blending. Blend until your arm is sore. It’s that important. 😂
- Setting It All In Place
Setting your makeup is the final step to make sure everything stays in place. Grab some translucent powder and lightly dust it over your face. Focus on areas like your under-eye and jawline to set your contour and highlight. Don’t overdo it, though—this isn’t a baking situation. Just a light touch will keep everything in place all day long. 🧑🍳
Look, contouring and highlighting don’t need to be scary. They’re just tools in your makeup kit to help enhance your natural features and give you that amazing glow. Once you practice a few times, it’ll be second nature, and you’ll be contouring like a pro. So don’t be afraid to experiment and have fun with it. It’s all about making it work for you, and the more you practice, the more confident you’ll feel.
Now go ahead and try it out. Grab your contour stick and highlighter, and get ready to create that sculpted glow. You’ve got this! 💪✨