Okay, let’s get real for a sec: have you ever spent hours getting your makeup just perfect, only to step outside and realize it’s a hot mess because you were working under bad lighting? Yep, we’ve all been there. 🤦♀️ It happens, but the good news is that you can avoid this disaster with just one simple thing – lighting!
If you’re a makeup artist or just a lover of all things beauty, you know that lighting is your best friend. Not only does it help you see what you’re doing, but it can also make or break your makeup look. Let’s dive into why lighting is so crucial and how to make sure you’re always working in the best light possible. 💡✨
Why Lighting Matters So Much
So, why is lighting such a big deal? Well, when you’re doing makeup, you need to see every detail – the shape of your brows, the blend of your eyeshadow, and most importantly, whether your foundation matches your skin tone. If you’re working under dim or yellowish lighting, you’re basically playing a guessing game, and no one wants to guess their way through a full-face look!
You know that moment when you think your foundation looks flawless in the mirror, but when you step into natural light, you realize you’ve created a patchy nightmare? Ugh, that’s all because of the wrong lighting. You’ve probably also over-blended your contour or missed a spot on your eyeshadow because the lighting didn’t show it clearly.
Types of Lighting Every MUA Needs:
When you’re applying makeup, lighting is basically everything, and there are a few types you need to know about to nail the perfect look every time:
Natural Light – The Gold Standard 🌞 If you can, ALWAYS try to do your makeup near a window with plenty of natural light. It’s like your makeup’s best friend – it shows you exactly what you’re working with and helps you see those colors in their true form. Natural light is ideal because it’s even and bright, and it’s how your makeup will look in the real world. Just be careful not to get too close to direct sunlight (you don’t want to be blinded while you’re blending! 😅).
Daylight Bulbs – A Close Second 💡 If you’re not near a window or it’s already dark outside (hello, 5pm winter days), daylight bulbs are your next best option. These bulbs mimic natural daylight, so they give you that true-to-life color without the weird yellowish hue that makes everything look off. Go for bulbs that are labeled “full-spectrum” or “daylight” for the best results. You’ll want your vanity or work area to have enough light to really see everything clearly, but without being too harsh or dim.
Soft LED Lights – The Game Changer ✨ When you’re dealing with harsh shadows or tricky angles, soft LED lights are a lifesaver. They provide even, bright light without creating those weird harsh shadows that can mess with your blending game. Plus, they’re energy-efficient, so you can keep your lights on all day (without feeling guilty about it!).
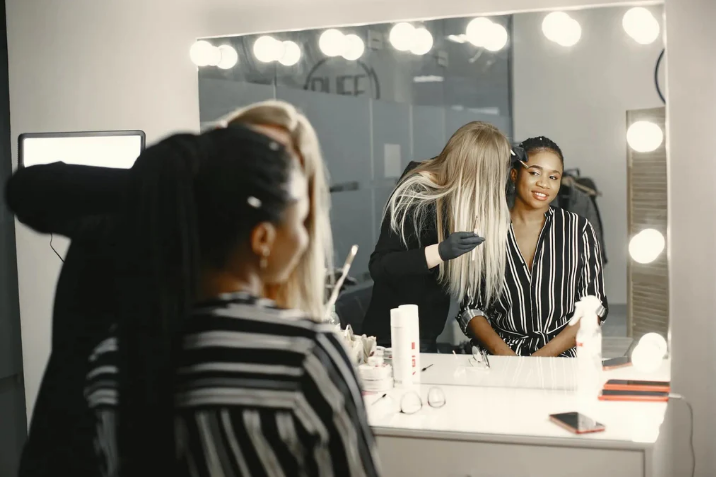
Ring Lights – Must-Have for MUAs 💍 If you’ve ever scrolled through beauty TikTok or Instagram, you’ve probably seen makeup artists using ring lights. Why? Because they’re amazing! The round shape of the light creates a nice, even glow that highlights your features without harsh shadows. Plus, it’ll make your makeup pop in photos – so you can confidently snap pics without worrying about weird lighting.
Tips for Getting Your Lighting Just Right:
Okay, now that we know why lighting is important and the best types to use, let’s talk about how to set yourself up for success. Here are some quick tips that’ll save you from ever having to fix your makeup after the fact:
Position Yourself Well Find a spot where you can get direct or reflected natural light (and avoid backlighting, please!). If you’re using a ring light or LED, make sure it’s at eye level or slightly above your head – you don’t want the light to shine up from below, or you’ll end up looking like a scary movie character. 😬
Avoid Overhead Lights Overhead lights are the worst for makeup – they cast shadows that can hide all the details. If you’ve got one of those overhead lights in your room, try to avoid it and use something more flattering, like a vanity mirror with built-in lighting.
Check Your Work in Multiple Lights Once you’ve finished your makeup, always check it in different types of light. Go to a window, step outside if you can, or even walk into a room with different lighting. If everything still looks good in all those situations, you’re golden!
Use a Mirror with Good Lighting If you’re working in a small space or need something portable, grab a makeup mirror with built-in lighting. Some of these mirrors even have adjustable brightness, which makes it easier to control your lighting based on the time of day.
Balance Brightness and Warmth The trick is to find a happy medium. Too bright and you’ll wash yourself out; too dim and you won’t see all the details. Balance the warmth of the light, too – you don’t want your makeup to look too cold or too yellow.
Trust me, investing in the right lighting is a total game-changer for makeup artists. You’ll save time, avoid mistakes, and get more confidence in your work when you can see everything clearly. And for those of us who work under all kinds of conditions (on location, in dim rooms, on the go), having that perfect lighting setup will make all the difference.
So next time you’re about to start a look, remember: light is your best friend. Work with it, not against it, and you’ll always be on point. 🌟
Now go light up your makeup world – literally! 💡💄