Okay, let’s be real – setting up a Facebook Business Page can sound like a “meh” task. But trust me, once it’s up and running, you’ll be like, “Why did I wait so long?” A Facebook Business Page is your digital storefront. It’s a place where your clients can find you, check out your work, and – most importantly – BOOK YOU!
So grab your coffee, and let’s break it down. You got this!
Step 1: Set Up Your Page (It’s Just Like Making a New Account!)
Don’t stress. Creating a Facebook Business Page is actually super easy. Here’s what you need to do:
- Log into your personal Facebook account – Yep, this one’s key. You’ll need a personal account to set up a business page (don’t worry, your clients won’t see your personal stuff unless you choose to share).
- Head to the Facebook Business Page Creator – Go to the “Pages” section from your Facebook homepage (you can find it in the left- hand menu), and click “Create New Page.” You’ll be asked for a few details:
. Page Name: Keep it simple. Ideally, your business name or something close to it. “Luxe Glam by [Your Name]” or “Sparkle Studio Makeup.”
. Category: Choose “Makeup Artist” or something similar. Facebook gives you suggestions based on your business type.
. Description: Don’t overthink this! Just say what you do and why you’re awesome. Something like, “Bridal, fashion, and special occasion makeup artistry – making you feel fabulous one brushstroke at a time!”
- Hit “Create” – Boom, You’re Official! You’ve got a blank canvas now. Let’s get painting. 😉
Step 2: Add a Profile Picture & Cover Photo (No Stock Photos, Please!)
This is your first impression, so make it count. A profile picture should be a photo of you (not your dog, unless your dog is your brand, which… cool). A professional headshot, or even a pic of you in action doing makeup, will work perfectly.
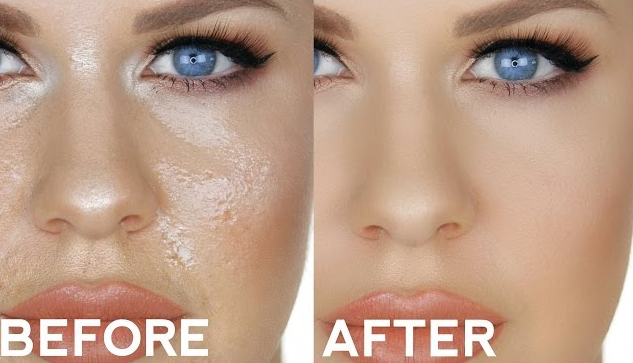
For your cover photo, show off your work. A before-and-after shot? A glam shot of your clients looking like absolute queens? YES, PLEASE! This is your chance to showcase what you do, so go for it.
If you don’t have a professional photographer, no worries. A well-lit photo on your phone can work wonders!
Step 3: Fill Out Your “About” Section (This Is Your Biz’s Bio!)
Alright, time to get real – the “About” section is where you tell people why they should book you. Be clear about what services you offer, where you’re based, and how to contact you. Here’s an example:
“I specialize in bridal, editorial, and event makeup with over 5 years of experience making clients look and feel amazing. Serving [Your City], book me today!”
It’s short and sweet, but it tells potential clients everything they need to know. If you’ve got special skills, like airbrush makeup or fantasy looks, now’s the time to add them in!
Step 4: Set Up a Booking Button (You Want Those Clients!)
This one’s big. Don’t let clients leave your page without booking. Facebook lets you add a Book Now button at the top of your page. You can link this to your booking system (e.g., Calendly, Booksy, or whatever you use).
Here’s a trick from experience: Don’t just leave it to chance. After setting up the button, test it yourself. Go through the booking process as if you were a client. You want it to be smooth and simple.
Step 5: Post, Post, Post! (But Don’t Go Crazy!)
Alright, this is where it gets fun – posting! Post your work, behind-the-scenes shots, tips for clients, or even just a quick “Hey, I’m available for bookings this weekend!” Your page needs to show you’re active.
What to Post:
. Makeup transformations – Before and afters are a crowd favorite! But, don’t just post the ‘after’ shot – show the full journey.
. Video tutorials or live demos – People love seeing your process. A quick “Get Ready With Me” video or tips on how to create a flawless base? Yes, yes, and YES.
. Client testimonials – A happy client sharing how amazing you made them feel? Post it! Social proof works wonders.
Don’t post too late at night – posting at 11 p.m. probably won’t land you that bridal gig! Stick to prime times like 7 p.m. when people are winding down after dinner.
Step 6: Engage! Don’t Just Post – Chat!
This is where a lot of MUAs miss the boat. Just posting isn’t enough. You’ve got to engage with your audience. If someone comments, reply! If someone DMs you asking for pricing, send a friendly reply right away. People love being heard.
Here’s the thing: The more you engage, the more Facebook will show your page to other people. Think of it like a workout – the more reps you do, the stronger your business page gets.
Step 7: Promote Your Page (Get the Word Out!)
You’ve got your page up, it looks fab, and you’re posting awesome stuff. Now, let’s get people to see it!
- Invite Friends – Facebook makes this easy. You can invite your personal Facebook friends to like your page. Do it!
- Share Your Page on Your Personal Profile – This doesn’t feel super “business-y,” but it’s a great way to get the ball rolling.
- Use Facebook Ads – If you want to get really serious about it, a small ad budget can go a long way. You can target brides, event planners, or anyone who might need your services.
Step 8: Track and Improve (Like a Pro!)
Now that your page is rolling, don’t forget to keep an eye on the insights (Facebook’s fancy way of saying “stats”). You’ll see what posts are working, what’s not, and what time your followers are most active.
If something works, do more of it! Post at the same times, share similar content, and keep tweaking things to find your groove.
Get It Done!
Creating a Facebook Business Page doesn’t have to be intimidating. It’s just one more step in getting your awesome makeup skills out there for the world to see. Once you get the basics down, you’ll be a Facebook marketing pro in no time.
So, what are you waiting for? Go ahead, set up that page and start posting. Your next client is out there waiting for you!
Let me know how it goes, I’m rooting for you!