If you’re a makeup artist looking to grow your business, Facebook Ads can be a game-changer. But let’s face it—figuring out how to target the right audience can feel like wading through a sea of confusing options. Don’t worry, though—I’ve got your back! In this step-by-step guide, we’re diving deep into creating Facebook Ads that actually reach your ideal clients. Whether you’re a beginner or just looking for a refresher, this guide is here to help.
Step 1: Define Your Goal (What Do You Want to Achieve?)
Before you even touch the “Create Ad” button, ask yourself: What do I want this ad to do?
Are you trying to book more bridal clients?
Promote a makeup workshop?
Sell your own beauty products?
Having a clear goal will guide all your ad choices—from the audience you target to the type of ad you create.
💡 Tip: Keep your goals specific and measurable. For example, instead of saying, “I want more clients,” go with, “I want to book five bridal clients this month.”
Step 2: Understand Your Audience
To get the most out of your ads, you need to know who you’re talking to. Facebook Ads are all about targeting, and this is where the magic happens.
Who’s Your Ideal Client?
Age range: Are you targeting brides, teens, or professionals?
Location: Are they in your city or surrounding areas?
Interests: Do they follow beauty influencers, love Sephora, or have an interest in weddings?
💡 Tip: Use Facebook Audience Insights to learn more about your audience’s behaviors and interests.
Step 3: Set Up Your Facebook Business Account
You’ll need a Facebook Business Manager account to create ads. Don’t worry—it’s free and super easy to set up.
Go to business.facebook.com.
Click on “Create Account” and fill in your business details.
Link your Facebook Business Page (make sure it’s already set up and optimized).
Step 4: Create a Campaign
Now, let’s jump into the fun part—setting up your ad!
Go to Ads Manager: You’ll find it in your Facebook Business account.
Click on ‘Create’: Choose your campaign objective (remember Step 1?). If you want more leads, choose Lead Generation. If you’re driving traffic to your website, go with Traffic.
Name Your Campaign: Use something simple like “Bridal Makeup Ad – February 2025” so you can track it easily.
Step 5: Define Your Audience (Targeting the Right People)
This is where Facebook Ads really shines. You can target:
Location: Pinpoint cities or regions you want to target.
Age & Gender: Most MUAs target women aged 18-40, but tailor this based on your niche.
Interests: Choose things like “Makeup tutorials,” “Bridal magazines,” or even “MAC Cosmetics.”
💡 Pro Tip: If you’re targeting brides, use interests like “Engaged (6 months)” or “Wedding Planning.”
Step 6: Choose the Ad Placement
You can let Facebook automatically place your ad (recommended for beginners) or customize placements. Here’s a quick breakdown:
Facebook Feed: Great for showcasing your makeup work with striking images.
Instagram Feed: Perfect if you’re targeting a younger audience.
Stories: Use vertical images or videos to grab quick attention.
Step 7: Create Your Ad (Show Off Your Makeup Skills!)
Now it’s time to design an ad that grabs attention and converts:
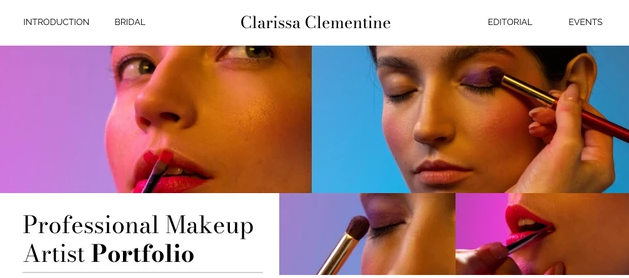
Visuals: Use high-quality photos or videos of your work. Think bridal makeup, glamorous looks, or before-and-after transformations.
Headline: Keep it short and catchy, like “Get Flawless Bridal Makeup—Book Now!”
Ad Copy: Speak directly to your audience’s needs. For example:
“Brides-to-be! Let me help you look stunning on your big day. Limited spots available—book your consultation today!”
Call-to-Action (CTA): Use CTAs like “Book Now,” “Learn More,” or “Message Us.”
💡 Tip: Use Canva to design eye-catching visuals if you don’t have professional photos ready.
Step 8: Set Your Budget
Facebook Ads are budget-friendly, but it’s important to set a realistic amount.
Daily Budget: Start small, like $5-$10 per day, and increase as you see results.
Lifetime Budget: If your campaign has a set end date, this option works well.
💡 Tip: Monitor your ad’s performance after 3-5 days. If it’s not working, tweak the audience or visuals.
Step 9: Monitor & Optimize Your Ads
Once your ad is live, don’t just “set it and forget it.” Keep an eye on its performance:
Check Metrics: Look at clicks, impressions, and conversions in Ads Manager.
Test & Improve: If your ad isn’t getting results, change up the image, copy, or audience targeting.
💡 Tip: Run A/B tests to see which version of your ad performs better.
Facebook Ads can feel overwhelming at first, but once you nail your targeting and visuals, it’s like having a magic wand for your makeup business. Start small, track your progress, and don’t be afraid to experiment.
With this guide, you’re ready to create ads that bring in clients who love your artistry. Let me know how your first campaign goes—I’d love to hear about your success! 💄✨