Alright, let’s talk brows. They’re literally the frames of your face, and when they’re on point, your whole look levels up. But getting them right? Yeah, it can feel like an Olympic sport sometimes. Too thin, too thick, too “uh-oh what happened?”—we’ve all been there. But don’t stress! With a few tricks, you can shape and define brows like an actual pro, even if you’ve accidentally over-plucked or are working with clients with wildly different brows.
Let’s get those arches snatched, shall we? 💁♀️
Step 1: Map It Out—Where Brows Should Start, Arch, and End
First things first, you need a game plan. Eyebrow mapping is your bestie here. Grab an eyebrow pencil (or a thin brush) and let’s break it down:
Where to Start: Hold the pencil vertically from the side of your nose. Where it lines up with the inner corner of your eye? That’s your starting point.
Where to Arch: Angle the pencil from the side of your nose through the center of your pupil. Boom, that’s where your arch should peak.
Where to End: Line the pencil from your nose to the outer corner of your eye. That’s your brow’s tail end.
Tip: If your client has asymmetrical features (and honestly, who doesn’t?), aim for balance, not perfection. Brows are sisters, not twins, remember?
Step 2: Grooming—Tame Those Wild Hairs
Now that you’ve mapped it out, it’s time to clean up the area. But pause—don’t go in like Edward Scissorhands!
Brush it out: Use a spoolie to brush the brow hairs upward and outward. This helps you see the natural shape.
Tweeze smartly: Pluck stray hairs below the brow line—never above! Over-tweezing is a one-way ticket to regret city.
Trim carefully: Brush the hairs up again and trim only the ones that stick way out. Think tiny snips, not a full haircut.
Tip: Always step back from the mirror to check the overall shape as you go. It’s so easy to overdo it when you’re too zoomed in.
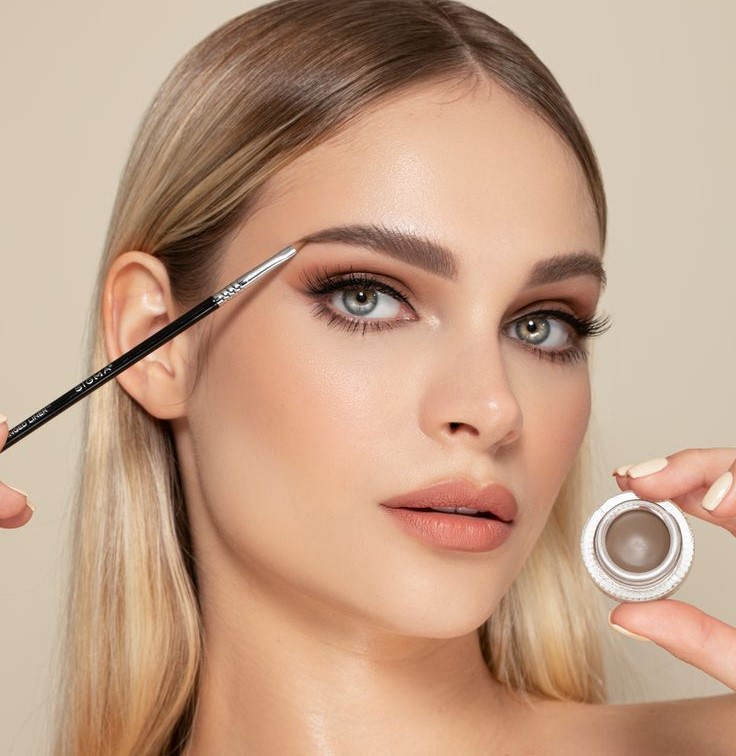
Step 3: Choose Your Weapon—Brow Product 101
Alright, let’s talk tools. Whether you’re filling in your own brows or a client’s, the product you choose makes a huge difference.
Pencil: Great for precise, hair-like strokes. Perfect for beginners or if you’re creating a defined look.
Powder: Gives a softer, more natural finish. Ideal for filling in sparse areas without harsh lines.
Pomade: Best for bold, Instagram-worthy brows. Use sparingly—it’s easy to go overboard!
Gel: Clear or tinted, this locks everything in place and adds texture.
Tip: Mix and match products for the ultimate custom look. For example, use a pencil to define the shape and powder to fill in gaps.
Step 4: Fill ‘Em In—Natural vs. Defined
Now for the fun part—filling in those brows!
Natural Brows: Use a pencil or powder to lightly fill in sparse areas, following the direction of hair growth. Focus on the tail and middle of the brow—leave the front a bit lighter for a softer look.
Defined Brows: Start by outlining the brow’s shape with a pencil or pomade. Then fill in the outline using small, hair-like strokes. Blend with a spoolie to soften the edges.
Tip: Always start with less product. You can build it up if needed, but removing too much? Ugh, nightmare.
Step 5: Highlight & Set—The Finishing Touches
You’ve shaped, filled, and defined—now let’s make those brows pop.
Highlight the Brow Bone: Apply a light, shimmery eyeshadow or concealer just below the arch. This lifts the brow and gives it a clean, polished look.
Set It: Use a clear or tinted brow gel to lock everything in place. This step makes a huge difference, especially if your client’s brows are unruly or you’re working in humid conditions.
Tip: For extra definition, trace the edges of the brow with a thin brush and concealer. It’s like contouring for your eyebrows.
Common Brow Mishaps (And How to Fix Them)
Overfilled Brows: Brush through with a clean spoolie to soften the product. If it’s still too much, lightly dab with a Q-tip and makeup remover.
Uneven Brows: Use a pencil to subtly balance out the shape. But don’t overdo it—remember, brows are meant to look natural.
Sparse Fronts: Use a light hand to mimic hair strokes. Avoid filling in too harshly; it can make the brows look blocky.
Practice Makes Perfect
Look, brows are tricky—whether you’re doing your own or someone else’s. But with these tips and a bit of practice, you’ll be shaping and defining like a pro in no time. And trust me, the more you do it, the more natural it’ll feel.
So grab your tools, put on your fave playlist, and get to work. You’ve got this! 💕