Okay, so your makeup case is a mess. I mean, it’s a HOT mess. We all know the feeling—powder residue, eyeliner smudges, and God knows what else stuck to the bottom. But don’t panic! 🤭 We’ve all been there, and trust me, cleaning your makeup case doesn’t have to be a nightmare. With the right approach, you can get that case looking brand new without risking any damage. Here’s how to do it:
- Start by Emptying the Beast
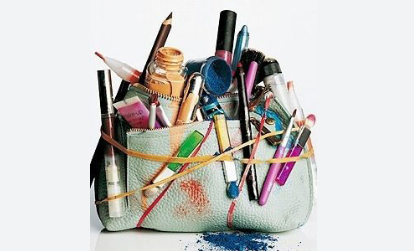
Before you even think about cleaning, EMPTY. IT. OUT. All your brushes, makeup, and tiny containers need to go somewhere safe. Get them out of the way so you can focus on the case. Make sure you have a clean surface to lay everything down. If your makeup is scattered everywhere like mine, this could take a hot minute… but it’s worth it. 💅 - Know Your Case Material
You can’t clean a plastic case the same way you’d clean a leather one, right? 🙄 Get familiar with what your makeup case is made of so you can pick the best cleaning method. For fabric cases, a lint roller works wonders for removing stray makeup bits. For plastic or metal cases, a soft cloth is the way to go. Leather cases? Let’s be gentle, girl. You don’t want any scratches! - Clean the Interior Like a Pro
Once the makeup’s out, it’s time to tackle the inside. If you have plastic compartments, just wipe them down with a damp cloth. Don’t soak the cloth—this isn’t a sponge bath for your makeup case! 🧽 For fabric interiors, use a fabric-safe cleaner or even a little mild soap diluted in water. Be super gentle here. You don’t want to risk loosening any stitching or causing fraying. - Tackle the Stubborn Stains
We all know that foundation never stays in the bottle, right? 😬 If you’ve got some stubborn makeup stains in the case, try using makeup remover wipes or a gentle dish soap solution. Don’t rub too hard, or you could risk damaging the fabric. For hard surfaces (like plastic or metal), a little bit of rubbing alcohol works wonders—just make sure it doesn’t touch anything that could get damaged. - Don’t Forget the Zipper or Clasps
Your zipper and clasps might be hiding all sorts of grime, especially if you’ve had a long day of makeup application (and snacks… don’t forget those). Wipe these down with a soft cloth or an old toothbrush to get into the nooks and crannies. If you’ve got any stubborn bits, a tiny bit of mild soap or a wipe should do the trick. Just be gentle. - Drying Time (Patience, Grasshopper)
Let your makeup case air dry completely before you start putting anything back inside. You don’t want to trap moisture, or worse, mold. I mean, can you imagine opening your kit and finding mold growing on your brushes? NO, THANK YOU. Just let it sit for a while—patience is key here. - Reorganize and Refresh
Now that your case is clean, it’s time for the fun part—reorganizing! 🎉 It’s the perfect opportunity to throw out expired products and give everything a little refresh. Clean brushes, refill your favorite products, and you’ll be amazed at how satisfying it is to see everything nice and tidy.
MUA’s tip:
If you travel a lot for work (lucky you!), consider using zippered pouches inside your case. These little helpers keep everything separated, so if you do spill anything, it won’t ruin the whole kit.
I know, I know… cleaning a makeup case doesn’t sound glamorous, but trust me, it’s so worth it. You’ll feel way more organized, and the next time you’re hunting for that lipstick you’re pretty sure you left in the bottom of your case, you’ll actually find it—without the stress!
So, take a deep breath and get your kit looking fresh again. You’ve got this, makeup artist! 💪