Hey, I know the struggle – you open your favorite gel liner or cream blush, and it’s basically a rock now. 😩 You’ve got a full day of clients ahead, and now your product is completely useless, right? Wrong! There are actually some super easy ways to bring those dried-out products back to life. Trust me, I’ve learned these tricks the hard way, and now I never panic when my favorite cream blush decides to pull a disappearing act.
Let’s dive into some must-know ways to save your products when they go all crusty on you. Because let’s be real – you can’t afford to replace everything. Especially when you’ve got a packed kit, a tight budget, and limited time. 👀💄
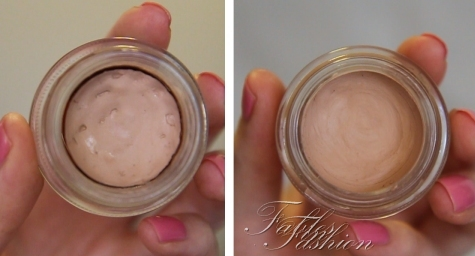
- For Creams and Gels: Oil to the Rescue Okay, I’m just gonna say it – oil is a game-changer! 🌟 If your cream blush, foundation, or gel liner is looking drier than a desert, try adding a drop or two of face oil (or any light oil you have on hand). Just mix it in with a spatula, or use your finger if you’re in a pinch. The oil helps bring the product back to its smooth, creamy consistency without compromising the finish. Don’t overdo it, though – you want to hydrate, not drown it! 💦
MUA’s tip: For gel liners or gel brows, mix in just a teeny bit of castor oil. This is thick enough to rehydrate the product but won’t make it too runny.
- Rehydrate with Some Setting Spray No oil on hand? No worries! Setting spray is your next best friend. Mist a little bit of your favorite setting spray on your dried-out cream products and then stir it in. Don’t drown it in spray, just a few spritzes to get things moving. This trick works especially well for foundation sticks or cream eyeshadows. If it’s still a little dry after the first try, give it another spritz and mix again.
- The Microwave Trick (Don’t Burn It!) Okay, this one sounds a bit wild, but it really works. If you’ve got a gel liner, cream highlighter, or something with a bit of a thicker texture, you can microwave it for just a few seconds. I recommend putting it in for about 5-10 seconds – no more, no less – then stir it up, and voilà, it’s revived! But watch out: You can’t just microwave it without supervision. It’s basically like giving your makeup a hot tub experience – just don’t let it boil!
- Mix in Some Aloe Vera Gel If you have a gel product that’s dried out but still salvageable, you can mix in a little aloe vera gel to add moisture back into it. Aloe is super hydrating and can help bring back the creaminess without changing the texture too much. It’s a miracle worker when you’re in a jam, and it won’t make your products too greasy or watery.
MUA’s tip: If you’re dealing with a dried-out mascara, use a tiny dab of aloe vera gel to loosen it up. Just be careful – don’t use too much or it’ll turn into a mess!
- Use the “Spatula Scrape” Method Sometimes the best way to get your product back to life is to remove the dried bits and start fresh. Grab a small spatula or an old makeup brush to scrape the product from the container. Once you’ve loosened up the dried parts, put them into a small container or jar, and add just a dab of oil or cream. Give it a good mix and see if that helps revive the consistency.
- For Lipsticks: Stick ‘Em in the Fridge If your lipsticks have started to crack or seem a little dried out, you can pop them in the fridge for a bit. This can help firm them up and bring them back to life. If that doesn’t work, use the oil trick mentioned above, or even gently warm the product up with a lighter for a second. Again – don’t go crazy with the heat, just enough to soften the edges.
- Use a Product Preserver Alright, so I totally get it if you’re ready to toss out that dried-out product. But hold up! Invest in a good product preserver. It’s a little thing you can buy to add into your products that’ll help them stay soft and fresh for way longer. It’s like having a backup plan to keep your kit looking fresh for longer without the stress of constant replacements. 💅
Bonus Tip!
Always make sure to close your makeup products tightly after use, and store them in a cool, dry place to avoid moisture buildup. Also, keep an eye on expiration dates – some products will naturally dry out or lose their potency over time, no matter what you do. If that’s the case, don’t be afraid to say goodbye and make room for something new.
There you go, friend! If your favorite products are looking a little tired, don’t toss them just yet. Use these tricks to revive your makeup products in a pinch and keep your kit fresh and ready for action. You’ve got this! 💪