Alright, let’s talk about the real stuff—sanitizing your makeup tools. I know, it’s not the fun part of doing makeup, but listen—clean tools are everything. If you’re serious about keeping your skin (and your clients’ skin) healthy, sanitizing is non-negotiable. But don’t panic, I’m not gonna make this sound like a lecture. We’re gonna keep it light, easy, and practical—because I know you’ve got enough on your plate already (hello, lost eyeliner pencil). So, grab your cleaning supplies, and let’s get into it!
- Why Sanitizing Your Tools is a MUST
Okay, first things first—why should we even bother? Here’s the deal: makeup tools, especially brushes and sponges, are a magnet for bacteria, oil, and makeup buildup. 😬 If you’re using dirty tools on your clients, you’re basically setting yourself up for a breakout party (and nobody wants that). Not to mention, you could cause irritation, infection, or transfer germs between clients. 😷 So, yes, your tools need cleaning, even if they don’t look that dirty (trust me, they are).
Tip: If you’re using tools on multiple clients, make sure to sanitize between each one. No one wants to risk spreading germs, no matter how great your foundation skills are. 🙅♀️
- What You’ll Need
Now, before we start, let’s talk about what you need to get the job done. No need for fancy products, just the basics:
Brush Cleaner (preferably alcohol-based, or you can use a DIY mix of alcohol and water)
Baby Shampoo or Gentle Soap (for those deep cleans)
Alcohol Spray (for spot cleaning between uses)
A Towel or Paper Towels (to dry everything off)
A Container for Soaking (like a bowl or a sink)
A Clean Space (don’t do this on your bed unless you’re into cleaning up makeup stains later)
And yes, I’m sure you’ve got all that stuff lying around. If you don’t, now’s the time to grab it. You don’t have to splurge on expensive products, but a little investment in a good brush cleaner can make a world of difference. 👍
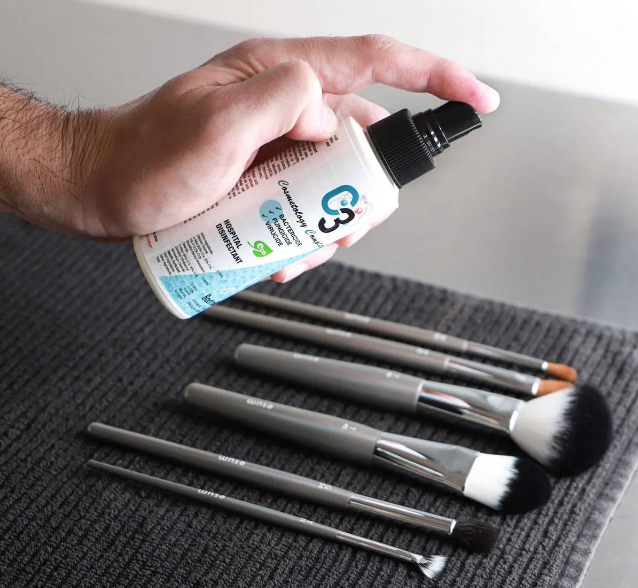
- Step 1: Start With Spot Cleaning 🧼
If you’re in between clients or just need a quick refresh on your tools, spot cleaning is the way to go. Grab your alcohol-based cleaner or your trusty brush cleaner, spray it directly on the bristles, and wipe it clean on a towel or paper towel. This will remove any leftover product or dirt and sanitize in a pinch.
Tip: If your brush is super dirty, give it a few spritzes to get it really clean. The goal here is to get rid of any product and germs, so don’t be shy with the spray!
- Step 2: Deep Clean Those Brushes 🧽
Alright, now for the deep cleaning. This is where you actually wash your brushes and sponges, which I know you probably avoid doing (I see you 😏). But trust me, you’ll feel so much better once they’re clean.
Wet the bristles of your brush under lukewarm water (don’t dunk the whole thing in water, just the bristles—brush handles don’t like getting soaked).
Gently squeeze out any excess water.
Pour a tiny bit of baby shampoo or gentle soap onto your palm (don’t go overboard or you’ll have bubbles everywhere).
Swirl the brush in the soap and gently lather it up. Don’t scrub too hard, you want to keep the bristles in good shape.
Rinse the brush under water until the water runs clear—keep rinsing until it’s all clean.
Lay the brush flat to dry on a clean towel (don’t stand it upright unless you want it to lose its shape).
Tip: If you’re cleaning brushes that you use with liquid products (foundation, concealer, etc.), you’ll want to clean those a bit more often. Those products stick in the bristles and breed bacteria like no other. Yuck. 🤢
- Step 3: Clean Your Sponges (Yes, You Have to) 🧠
Sponges! If you’re like me, you might forget about them until it’s too late. But honestly, sponges can carry SO many germs, and they need love too. Here’s how you clean them:
Dampen your sponge with warm water. (Don’t soak it through like a sponge bath, just a light dampening).
Apply a drop of gentle soap (baby shampoo works great here, too) directly to the sponge.
Massage the soap into the sponge, gently squeezing out any makeup residue.
Rinse it thoroughly under running water until it’s clean.
Tip: Make sure your sponge is dry before you use it again. Wet sponges can transfer bacteria (and we don’t need that). Also, don’t forget to clean them regularly—every few uses at least!
- Step 4: Sanitize Your Makeup Palettes and Tools 💄
It’s not just your brushes and sponges that need a little TLC. You’ve gotta sanitize your makeup palettes, tweezers, eyelash curlers, and anything else that touches your face. Here’s how:
For powder-based products (like eyeshadow), you can just give them a good spray with alcohol. Wipe it down with a clean tissue or paper towel, and you’re golden.
For cream products (foundation, concealer), use a clean spatula or a cotton pad to scrape off the top layer (just to be safe). After that, wipe the surface with a sanitizing wipe or alcohol.
Tip: Don’t forget your eyelash curlers and tweezers! Wipe them down with alcohol or a sanitizing wipe to keep them germ-free.
- Step 5: Keep Everything Clean Between Uses 🙌
I know you’re busy and probably don’t want to stop between every client to sanitize your tools (trust me, I get it). But it doesn’t have to take forever! A quick spritz of alcohol on your brushes or tools between clients can save you time and keep your tools sanitized. Just a quick clean after each use will go a long way in preventing build-up and keeping things fresh. 🙏
Tip: Make a habit of cleaning your brushes at the end of each day—don’t let the dirt pile up. This will make your life so much easier in the long run.
Sanitizing your tools doesn’t need to be this overwhelming chore—it’s just part of being a makeup artist (or a serious beauty lover). Plus, it’ll keep your skin and your clients’ skin happy and healthy. You’ll feel so much better when everything’s fresh and clean. So next time you’re about to pick up a brush or sponge, think about how clean it is. And if it’s not, take two minutes to give it some love. Trust me, you’ll thank yourself later. 💖