Alright, MUA fam, we all know Pinterest is the place for makeup inspiration, beauty trends, and creative visuals. But, did you know it’s also one of the best ways to market your makeup business? Whether you’re just starting your career or you’re a seasoned pro, setting up a Pinterest Business Account will help you reach clients, book gigs, and show off your beautiful makeup looks. If you’re ready to take your beauty business to the next level, let’s dive into this step-by-step guide and get your Pinterest presence on point! 💁♀️💅
Why Pinterest is a Goldmine for Makeup Artists :🎨✨
Before we get into the technical stuff, let’s talk about why Pinterest is such an awesome platform for makeup artists.
Pinterest is visual: We all know makeup is visual. People are on Pinterest searching for inspiration, tips, and tutorials for their next look. This is your chance to show off your artistry in a fun, creative way. 📸
Reach a huge audience: There are over 400 million active Pinterest users every month—yeah, you heard that right! Your target audience (brides, makeup lovers, beauty enthusiasts) is out there, looking for exactly what you offer.
Drive traffic and bookings: Pins lead to clicks. By optimizing your profile and pins, you can direct people to your website or booking page to make those sweet bookings.
Brand building: Pinterest lets you create boards that reflect your business identity. From bridal beauty to glam transformations, this is where you create a mood board for your entire brand.
Now that we’re all excited about the potential, let’s get that business account set up, shall we? 💁♀️
Step 1: Create Your Pinterest Business Account 🎉
First things first—let’s get that Pinterest account set up!
- Visit Pinterest.com
Go to Pinterest.com and click the “Sign Up” button if you’re a brand-new user. If you already have a personal account (and you’re ready to make the switch to business), don’t worry—you can convert it to a business account with just a few clicks. - Select “Business Account”
It’s super simple. Choose the option to create a business account. Pinterest makes it easy to switch, so don’t stress if you’re converting. A business account will unlock all those amazing analytics and shoppable pins we’re all about! 🔥 - Fill in Your Details
You’ll need to provide your business name (yep, keep it your makeup brand name), an email address (pro tip: use an email specifically for your business), and create a password. Keep your business email handy because Pinterest might send important notifications here. - Click “Create Account”
Once that’s done, hit “Create Account” and voilà—you’ve officially joined Pinterest’s business community! 🙌
Step 2: Complete Your Profile (Make It Stand Out!) 💖
Now that you’re in, let’s make sure your profile reflects your business and screams “I’m here to help with all your beauty needs!” Here’s how you can do that:
- Add a Profile Picture
This is your first chance to show who you are! Use a professional photo (a clean shot of you working or a high-quality logo). Make it clear and recognizable so that potential clients can instantly associate it with your makeup brand. 🎨✨ - Choose Your Profile Name
Use your business name! This is a branding opportunity, so keep it simple. Try to avoid using random numbers or quirky additions—let’s keep it professional so people can find you easily. 👀 - Write a Killer Bio
Your bio is where you’ll tell your audience exactly what you do. Be clear and concise, but also try to add a touch of personality. Are you a bridal makeup pro? A glam guru? Tell everyone what you’re about. Pro tip: add keywords like “bridal makeup artist,” “event makeup,” or “flawless makeup” so your profile shows up in search results. Plus, don’t be afraid to add an emoji or two to make it pop! 💋 - Add Your Website
Got a website or a portfolio? Put that link here so potential clients can easily find your full range of services. It’s an easy way to get traffic straight to your site. If you don’t have a website yet, no worries—add a link to your Instagram or Facebook business page for now. 📅
Step 3: Create Boards That Showcase Your Artistry 💅💕
Boards are your visual portfolio on Pinterest, and they’re essential for sharing your work. Here’s how to set them up and make them shine:
- Think About Your Services
What do you offer that people are searching for? Think about your specialties and make boards around those. Here are a few ideas:
Bridal Beauty Looks 💍
Smoky Eye Makeup 🔥
Bold Lip Looks 💄
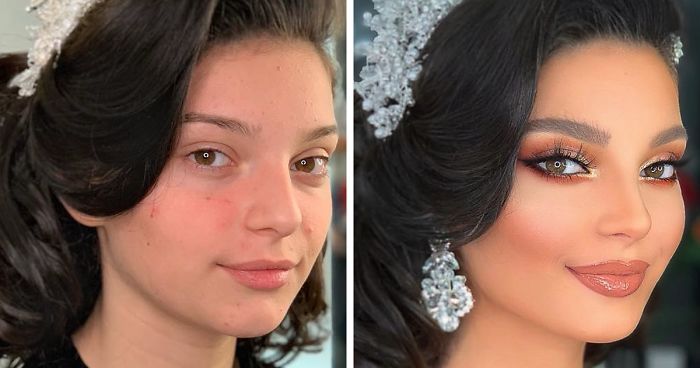
Before and After Transformations 💥
- Give Your Boards Clear Titles
Don’t make people guess what’s inside. Be clear! For example, “Soft Glam Makeup” is more helpful than just “Glam.” Keep it easy for people to find what they need! - Add Pin Descriptions with Keywords
When you describe each board, include keywords like “bridal makeup inspiration” or “best foundation for oily skin.” This will help Pinterest know what your boards are about, which makes them easier to find. 🎯 - Pin Your Best Work
This is where you’ll show off your artistry! Upload your best photos and be sure to include a few tutorials or even blog posts. A mix of visual content will keep your boards engaging and shareable. Make sure to also pin content that’s relevant to your audience—like tutorials or product recommendations that complement your makeup looks!
Step 4: Pin Like a Pro! 📌
Now that you have boards set up, let’s get those pins rolling! Don’t worry—it’s easier than it sounds.
- Choose Eye-Catching Images
When uploading pins, make sure the image quality is top-notch. Pinterest is a visual platform, so make sure your photos are well-lit and capture your makeup artistry in all its glory. No blurry, low-light shots, please! 📸 - Craft Descriptions That Spark Interest
For each pin, write descriptions that clearly explain the image. Include the products you used or a call-to-action (like “Click to learn how to recreate this look!”). Add keywords to make sure your pins get discovered in searches. 🌟 - Use Hashtags
Pinterest loves hashtags! Add up to 20 hashtags to your pins to boost their visibility. Just make sure they’re relevant—#MakeupArtist, #BridalMakeup, and #BeautyTips will work wonders. 📈 - Be Consistent with Pinning
Try to pin daily. It doesn’t have to be a ton—just a few well-crafted pins every day will keep your boards active and fresh. The more you pin, the more chances you have to get discovered. 🎉
Step 5: Optimize Your Pinterest Profile for Search 🔍
Want to be found? Here’s how to make sure you’re popping up in the right searches:
- Use Keywords Everywhere
Make sure your profile, board titles, and pin descriptions all include relevant keywords. Think about what your audience is searching for. Keywords like “bridal makeup looks” or “best makeup tips” will help your profile show up when clients search for those terms. 🎯 - Look at Pinterest Trends
Pay attention to what’s trending on Pinterest—whether it’s a specific makeup look or a beauty trend. Hop on these trends to get noticed, and try incorporating them into your boards or pins.
Step 6: Boost Your Reach with Pinterest Ads 🚀
Feeling like you’re ready to take your Pinterest game to the next level? Pinterest Ads can help. You can promote your best-performing pins and show them to a wider audience.
- Start Small
Don’t stress if you’re new to Pinterest Ads—start with a small budget, see what works, and grow from there. You can boost individual pins or run campaigns targeting specific audiences (brides-to-be, anyone?). 💥
Step 7: Track Your Performance and Celebrate Your Wins! 🏆
You’re almost there! Pinterest Analytics is where the magic happens. It shows you how well your pins are performing, who’s interacting with your content, and what boards are getting the most attention. Use this data to adjust your strategy and keep improving.
Time to Pin and Shine! 💖
And there you have it, superstar—your Pinterest business account is now ready to rock! 🎉 Whether you’re sharing bridal inspo or creating makeup tutorials, Pinterest is your new secret weapon for building your brand, attracting clients, and getting your art out there for the world to see. Get pinning, have fun with it, and don’t forget to keep it real. You got this! 😎💅